5 members
This tutorial will guide you through the steps of configuring the different PokeResearch bots for your local Pokémon GO community.
To begin, add the bot PokeResearchAdminBot to a group that only your community admins can access.
/communityname Diablo Valley Pokémon GO
The name of your group is now 'Diablo Valley Pokémon GO'.
To begin, add the bot PokeResearchAdminBot to a group that only your community admins can access.
Once you've added the bot, use the /communityname command to set the name of your local Pokémon GO community.
As an admin, you won't run into this value very often. But users who connect with the PokeResearchBot will see this name and feel more comfortable knowing they are connecting to the right group.
/export
97644a88-a944-4d7c-87c1-66c3810ed9d2
As an admin, you won't run into this value very often. But users who connect with the PokeResearchBot will see this name and feel more comfortable knowing they are connecting to the right group.
This is an important step. Execute the /export command and store this identifier in a secret, secure location.
If for some reason the group containing the PokeResearchAdminBot is deleted, you can use the /import command to reconnect to your research list. You can also use the /import command to move PokeResearchAdminBot from one group to another.
/links
Begin a conversation with the PokeResearchBot ...If for some reason the group containing the PokeResearchAdminBot is deleted, you can use the /import command to reconnect to your research list. You can also use the /import command to move PokeResearchAdminBot from one group to another.
Add the PokeResearchPublishBot to a Telegram group or channel ...
View all reported tasks on Google Maps. The community map is to share with all members of your community. The admin map is only for your community moderators ...
Before configuring tasks and channels, let's get to know the bot a little better.
Run the /links command.
The research bot works by allowing members of your community to report individual tasks found at PokéStops. Members report tasks with the PokeResearchBot link.
Community members can see these tasks on Google Maps. Provide the PokeResearchBot link and the community map link to all your members via Facebook, Telegram, etc.
Community administrators have a special version of the task map by using the admin map link.
The admin map does not need to be kept secret. It has additional information that is not useful to regular community members. All administrative actions must still be performed with the PokeResearchAdminBot.
The admin map does not need to be kept secret. It has additional information that is not useful to regular community members. All administrative actions must still be performed with the PokeResearchAdminBot.
Finally, there is the PokeResearchPublishBot link. This link adds the publish bot to one of your telegram groups, supergroups, or channels.
The publish bot finds important tasks on the research map, within a certain geographic area, and publishes those tasks to Telegram.
The next step of the tutorial will be to configure and publish tasks for your community.
/group new Important Tasks
Your group 'Important Tasks' has been created.The publish bot finds important tasks on the research map, within a certain geographic area, and publishes those tasks to Telegram.
The next step of the tutorial will be to configure and publish tasks for your community.
(Additional information...)
The /group command creates a group of tasks with significant rewards. (You will configure what is "significant" to your community.)
Each group of tasks can be named, configured, published to a Telegram channel, and/or filtered on the research map.
In the above example we created a new group with the "new" subcommand. Provide a name that will help your users identify these tasks on the research map.
/group add charged TM
'Important Tasks' will now publish tasks that reward Charged TMs.
In the above example we created a new group with the "new" subcommand. Provide a name that will help your users identify these tasks on the research map.
Use the /group "add" subcommand to add a new item to your group.
If you only have one group, the item will automatically be added.
If you have more than one group, the bot will prompt you to choose which group.
You can use the "add" subcommand more than once in order to add multiple items to a group.
When a reward is assigned to a group, any task with that reward is automatically added to the group. This means channels connected to this group will begin to publish these tasks. Also, the research map will contain these tasks when filtered by your group.
/group add 3 rare candy
'Important Tasks' will now publish tasks that reward 3 or more Rare Candy.
You can use the "add" subcommand more than once in order to add multiple items to a group.
When a reward is assigned to a group, any task with that reward is automatically added to the group. This means channels connected to this group will begin to publish these tasks. Also, the research map will contain these tasks when filtered by your group.
The "add" subcommand can also take an optional number which indicates the amount that will trigger the task to become part of the group.
In this example, a task that rewards 1 or 2 Rare Candy will not be included in this group. However, a task that rewards 3 or more Rare Candy will be included.
Without specying an amount, the group will include any rewarded amount (i.e. 1 or more.)
/group add larvitar
'Important Tasks' will now publish tasks that reward encounters with Larvitar.
In this example, a task that rewards 1 or 2 Rare Candy will not be included in this group. However, a task that rewards 3 or more Rare Candy will be included.
Without specying an amount, the group will include any rewarded amount (i.e. 1 or more.)
You can also use the "add" subcommand to add a new Pokémon encounter to your group.
Just like with items, you can add multiple Pokémon to each of your groups.
When a Pokémon is assigned to a group, any task with a possible encounter of that Pokémon is automatically added to the group.
/group details important
Name: Important TasksJust like with items, you can add multiple Pokémon to each of your groups.
When a Pokémon is assigned to a group, any task with a possible encounter of that Pokémon is automatically added to the group.
# Subscriptions: 0
Rewards: Charged TMs and 3 or more Rare Candy
Pokémon: Larvitar
To see the current details of your group, use the "details" subcommand.
You don't need to specify the entire name of the group — just enough for the bot to figure out which group you mean.
In the above example you can see that there are no subscriptions for this group yet. We want to publish this group to a Telegram supergroup, but first we need to define a geographic area where the tasks will come from.
Creating a new area requires us to know complex things, such as the central point and distance. To identify these, the research bot provides tools on the admin map.

Opening the admin map will bring up the research map in a browser.
All users will see the FILTER tab at the bottom, but only administrators will see the ADMIN tab.
Click on the ADMIN tab to open it.
Click on the ADMIN tab to open it.
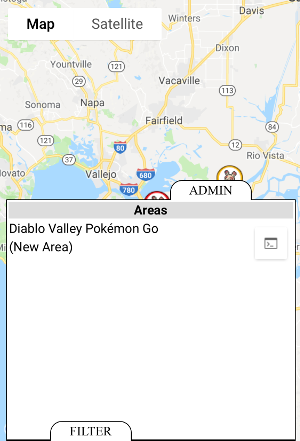
In the ADMIN tab you will see a list of areas for your community. (To begin with, the list will be empty.)
Click on the "(New Area)" row.
Click on the "(New Area)" row.
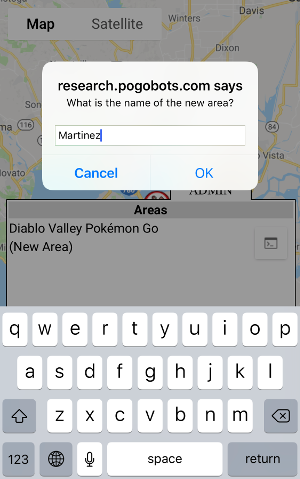
Enter the name for your new area and click OK.
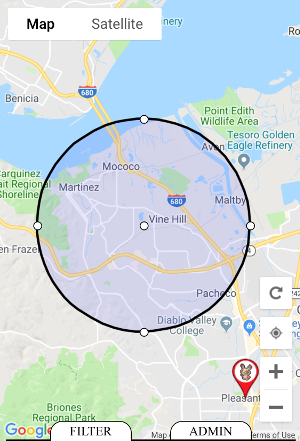
A circle will appear on the map.
You can drag the center and edges of the circle until it surrounds the desired area.
When you're done, click on the ADMIN tab again.
When you're done, click on the ADMIN tab again.
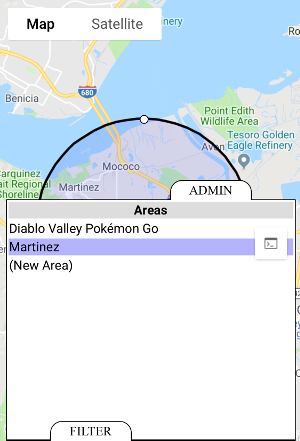
In the upper-right of the ADMIN tab, click on the Commands button.
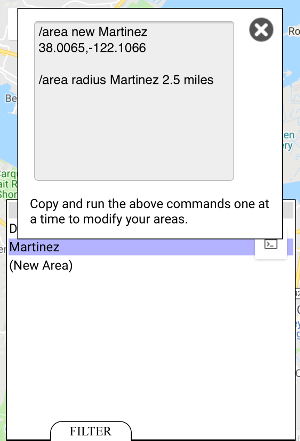
A list of commands will be displayed for any areas you have created or modified.
Let's take these two example commands and execute them in Telegram.
/area new Martinez 38.0065,-122.1066
Your area 'Martinez' has been created. The default radius is 5 miles.Let's take these two example commands and execute them in Telegram.
(Additional information...)
The /area command creates and configures geographic areas. The "new" subcommand creates a new area.
You can also use the command without specifying the map coordinates, in which case Telegram will prompt you to manually select a location on a map instead.
/area radius Martinez 2.5 miles
Your area 'Martinez' now has a radius of 2.5 miles.
You can also use the command without specifying the map coordinates, in which case Telegram will prompt you to manually select a location on a map instead.
By default, all new areas have a radius of 5 miles (or 8 km).
The /area "radius" subcommand modifies the radius of an area.
Distances can be specified in miles or kilometers. A single area cannot be larger than 12 miles (or 20 km).
Distances can be specified in miles or kilometers. A single area cannot be larger than 12 miles (or 20 km).
Now that you've created a group and an area, it's time to publish those tasks to Telegram. In this tutorial, we will publish to a Telegram supergroup. Publishing to a Telegram channel is very similar, except you execute the same commands in the admin group, not the target channel itself.
The first step is to add PokeResearchPublishBot as an administrator or your target group/supergroup. The easiest way to do that is to click on the PokeResearchPublishBot link from the /links command.
Then, navigate to the target group, if you are not there already.
The first step is to add PokeResearchPublishBot as an administrator or your target group/supergroup. The easiest way to do that is to click on the PokeResearchPublishBot link from the /links command.
Then, navigate to the target group, if you are not there already.